A geeky, faux-metal helmet
Jun. 17th, 2012 01:16 pmHello! I'm new here, and I'd like to post about something I did yesterday.
I spent a fun afternoon at Hack42 yesterday, and made myself a geeky looking, sciency faux-metal helmet. It has blinky LEDs too.
I liked this Instructable, but not the sprockets on the side; besides, it was done using a material that we can't get here (Rub'N'Buff), and I didn't want to spend the money and time to order it. So I changed the process up a bit.

This is Yamiguru's original version, where I got the idea from.
Click to see the full description.
I started with a normal construction helmet or hard hat, bought at the charity shop for 1,50 €.
I used sandpaper to make scratches all over it so the paint would hold, then used a marker to draw 'welding lines' and 'rivets'; I then traced those lines and dots with hot glue.

I also had this little electronics kit called 'LED rainbow kit'. It's a simple circuit, suitable for beginners, that you solder together and put batteries in, and it has a row of six LEDs that can light up in red, yellow or green. The integrated chip is programmed with all kinds of fun sequences and you can switch from one fo another by pushing a button.
This seemed a great opportunity to use it, so I built it and behold, it worked! I then cut a hole in the front of the helmet, large enough for the battery holder behind the circuit board to fit through; the batteries were then inside the helmet, the board itself was outside on the front. I attached it with hot glue and covered the components in masking tape for the next step...
I took the helmet outside and spray painted it black. Then when it was dry, I sprayed silver paint on a paint roller and rolled the paint over the helmet, using only a little bit of paint and no pressure. I wanted all the little nooks and crannies to stay black, for a weathered effect.
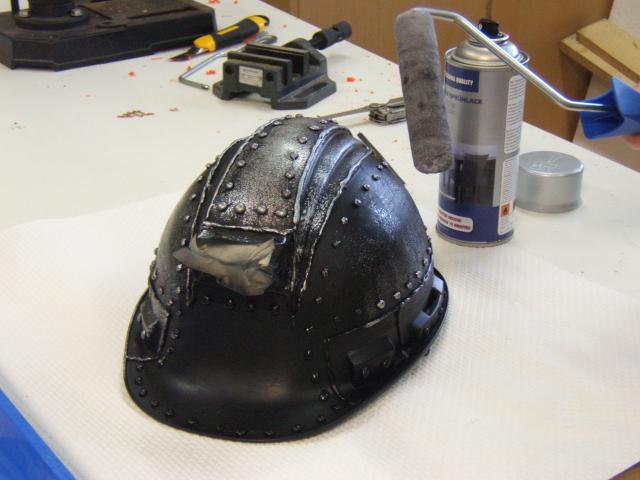
Then, when it was dry again, I sprayed it with a coat of clear varnish. Finally I removed the masking tape, taped the components on the circuit board individually and gently sprayed the board itself with silver.
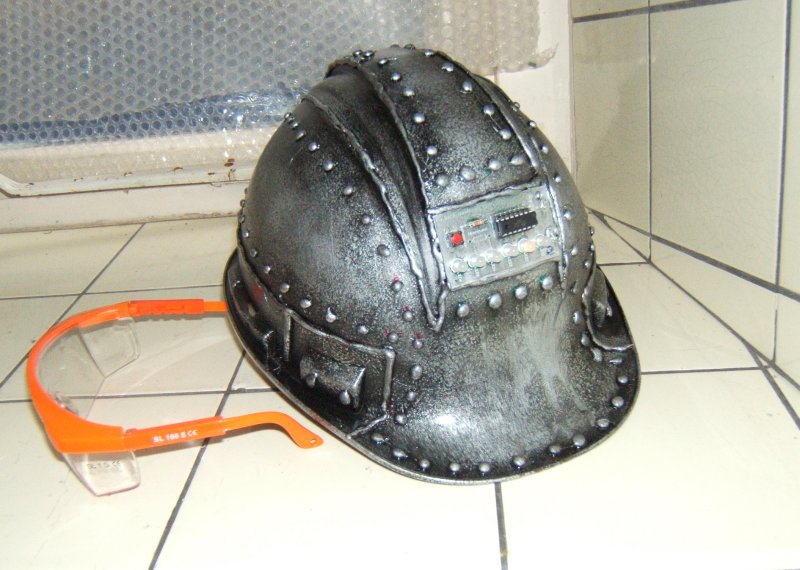
All done! Time to put the straps back into the helmet, adjust them to my correct size, switch the blinky LEDs on and wear the finished product with geeky pride!

A better look at the finished helmet.
I spent a fun afternoon at Hack42 yesterday, and made myself a geeky looking, sciency faux-metal helmet. It has blinky LEDs too.
I liked this Instructable, but not the sprockets on the side; besides, it was done using a material that we can't get here (Rub'N'Buff), and I didn't want to spend the money and time to order it. So I changed the process up a bit.
This is Yamiguru's original version, where I got the idea from.
Click to see the full description.
I started with a normal construction helmet or hard hat, bought at the charity shop for 1,50 €.
I used sandpaper to make scratches all over it so the paint would hold, then used a marker to draw 'welding lines' and 'rivets'; I then traced those lines and dots with hot glue.
I also had this little electronics kit called 'LED rainbow kit'. It's a simple circuit, suitable for beginners, that you solder together and put batteries in, and it has a row of six LEDs that can light up in red, yellow or green. The integrated chip is programmed with all kinds of fun sequences and you can switch from one fo another by pushing a button.
This seemed a great opportunity to use it, so I built it and behold, it worked! I then cut a hole in the front of the helmet, large enough for the battery holder behind the circuit board to fit through; the batteries were then inside the helmet, the board itself was outside on the front. I attached it with hot glue and covered the components in masking tape for the next step...
I took the helmet outside and spray painted it black. Then when it was dry, I sprayed silver paint on a paint roller and rolled the paint over the helmet, using only a little bit of paint and no pressure. I wanted all the little nooks and crannies to stay black, for a weathered effect.
Then, when it was dry again, I sprayed it with a coat of clear varnish. Finally I removed the masking tape, taped the components on the circuit board individually and gently sprayed the board itself with silver.
All done! Time to put the straps back into the helmet, adjust them to my correct size, switch the blinky LEDs on and wear the finished product with geeky pride!
A better look at the finished helmet.
no subject
Date: 2012-06-17 12:22 pm (UTC)no subject
Date: 2012-06-17 12:37 pm (UTC)The Instructable was a great starting point, which helped a lot, of course.
The great thing about hackerspaces is that no one will give you funny looks for wearing something like this. Instead, they'll be all 'Hey that's cool, will you do a workshop so I can make one too?'
no subject
Date: 2012-06-17 12:38 pm (UTC)no subject
Date: 2012-06-17 01:27 pm (UTC)no subject
Date: 2012-06-17 01:44 pm (UTC)no subject
Date: 2012-06-18 03:09 am (UTC)I love how the metal effect turned out.
no subject
Date: 2012-06-18 09:27 am (UTC)no subject
Date: 2017-09-04 11:28 am (UTC)